
Fun-Filled Treats: Crafting Ice Cream Cone Cake Pops Using Donut Holes

Ice cream cone cake pops are a whimsical treat that delights both kids and adults alike. The first time I made these was about 8 years ago for my son’s 1st birthday party, and let me tell you they were a hit! With a few simple ingredients and some creativity, you can transform ordinary donut holes into adorable miniature ice cream cones. In this guide, we’ll walk you through the steps to create these delicious and visually appealing treats that are perfect for any occasion.

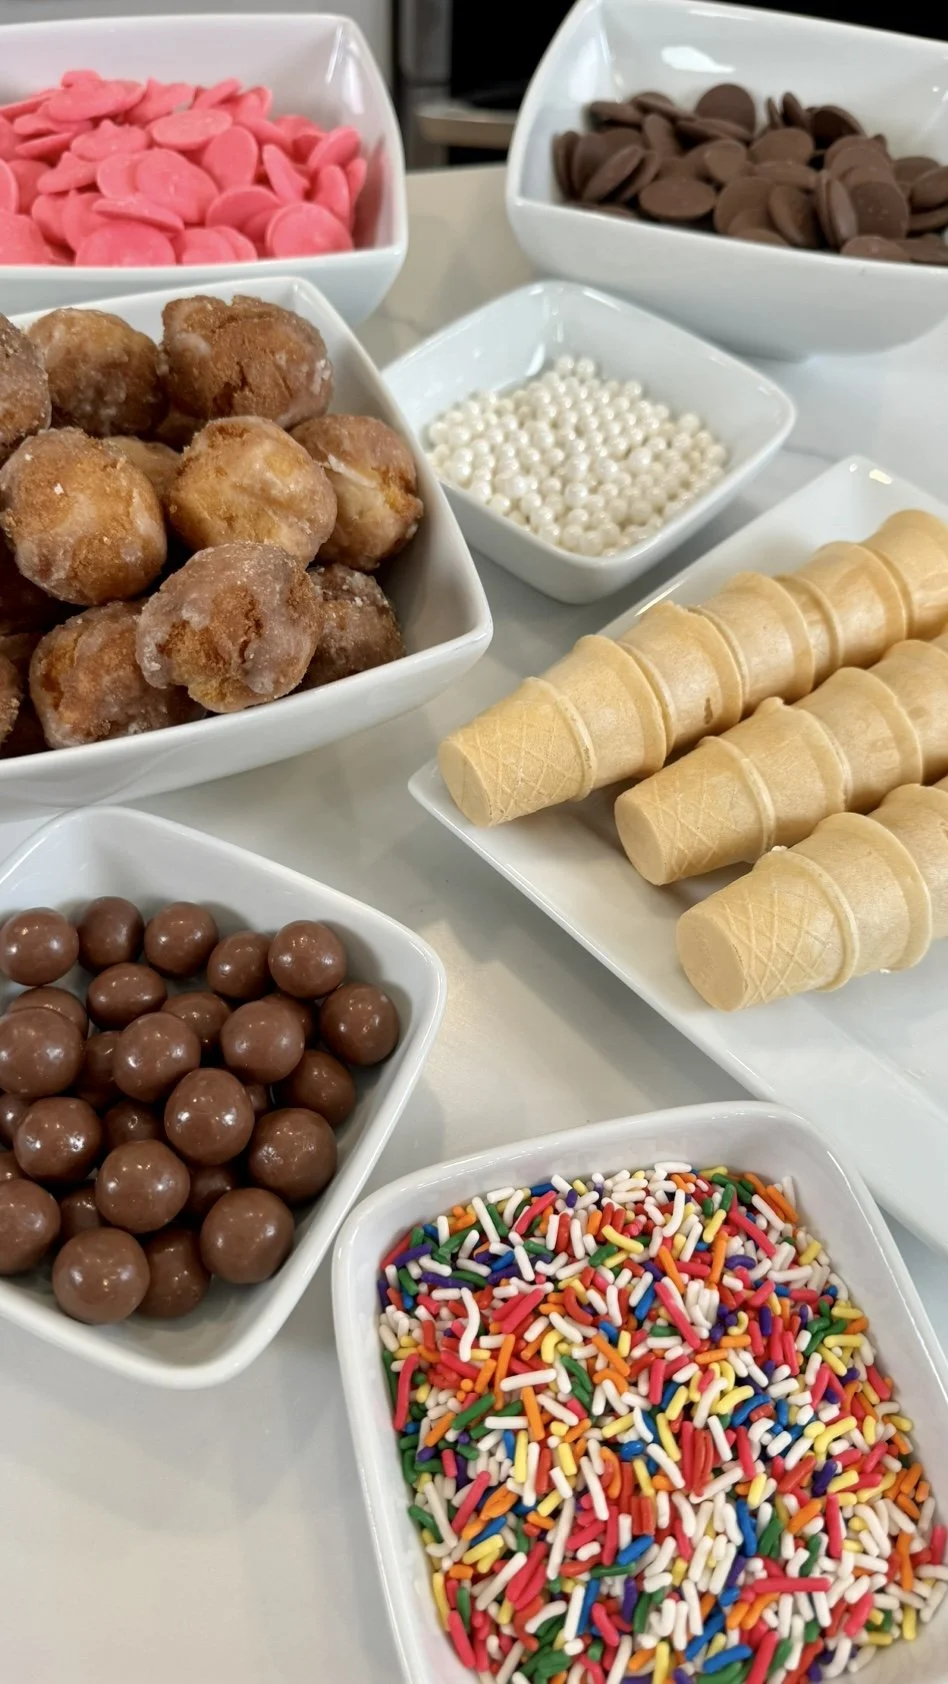
Gather Your Ingredients:
To get started, you’ll need the following ingredients:
Donut holes (I suggest store-bought to save time)
Melted chocolate or candy melts
Whoppers or any other candy of your choice for the surprise filling
Sprinkles or nonpareils for decoration
Coconut Oil - (This is optional but will give the chocolate and/or candy melts a glossy finish and will be a bit easier to work with.
Prepare Your Workstation:
Before you begin assembling your ice cream cone cake pops, it’s essential to set up your workstation. Line a baking sheet with parchment paper or set out a silicone mat to place the finished cake pops on. Arrange your ingredients and within easy reach to streamline the process.
Melt Your Chocolate or Candy Melts:
To melt your chocolate or candy melts, opt for a microwave-safe bowl and heat in 30-second intervals. For easier handling and a glossy finish, consider adding a small amount of coconut oil to the chocolate mixture. I suggest starting with a teaspoon.

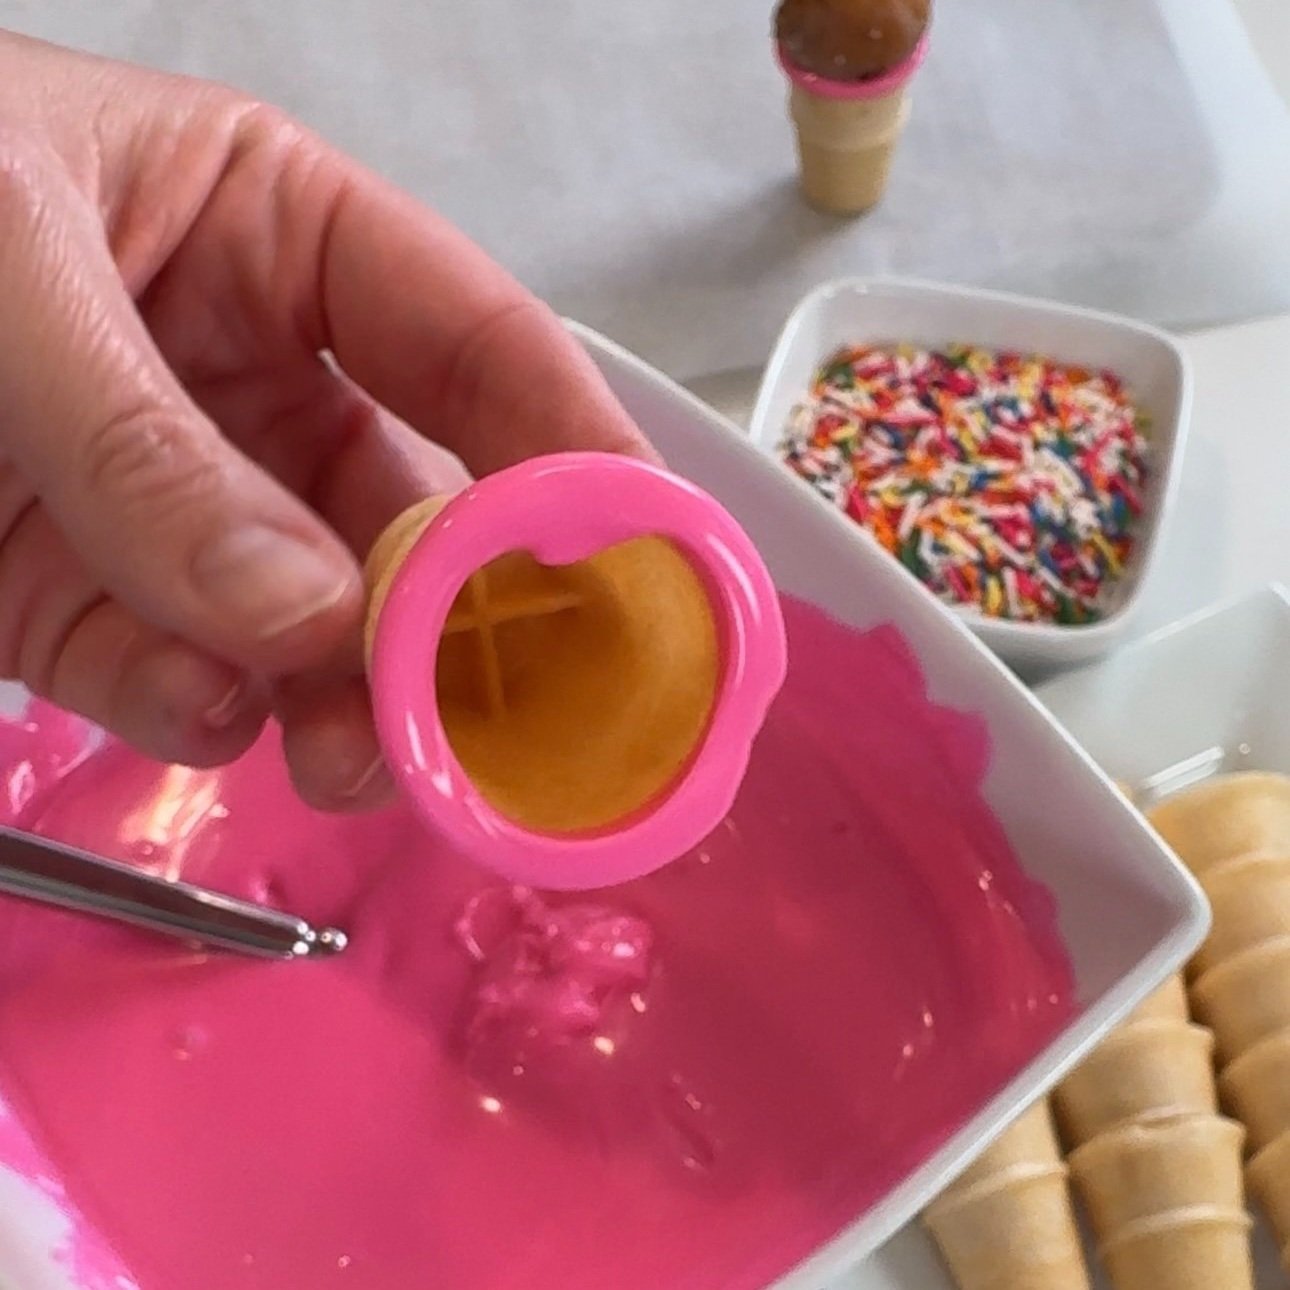
Dip the Cones:
Start by dipping the rim of each ice cream cone into the melted chocolate or candy melts. This will act as the adhesive to attach the donut holes. You can use a spoon or a small spatula to help coat the rim evenly. Allow any excess chocolate to drip off before placing the cones upright on the prepared baking sheet.
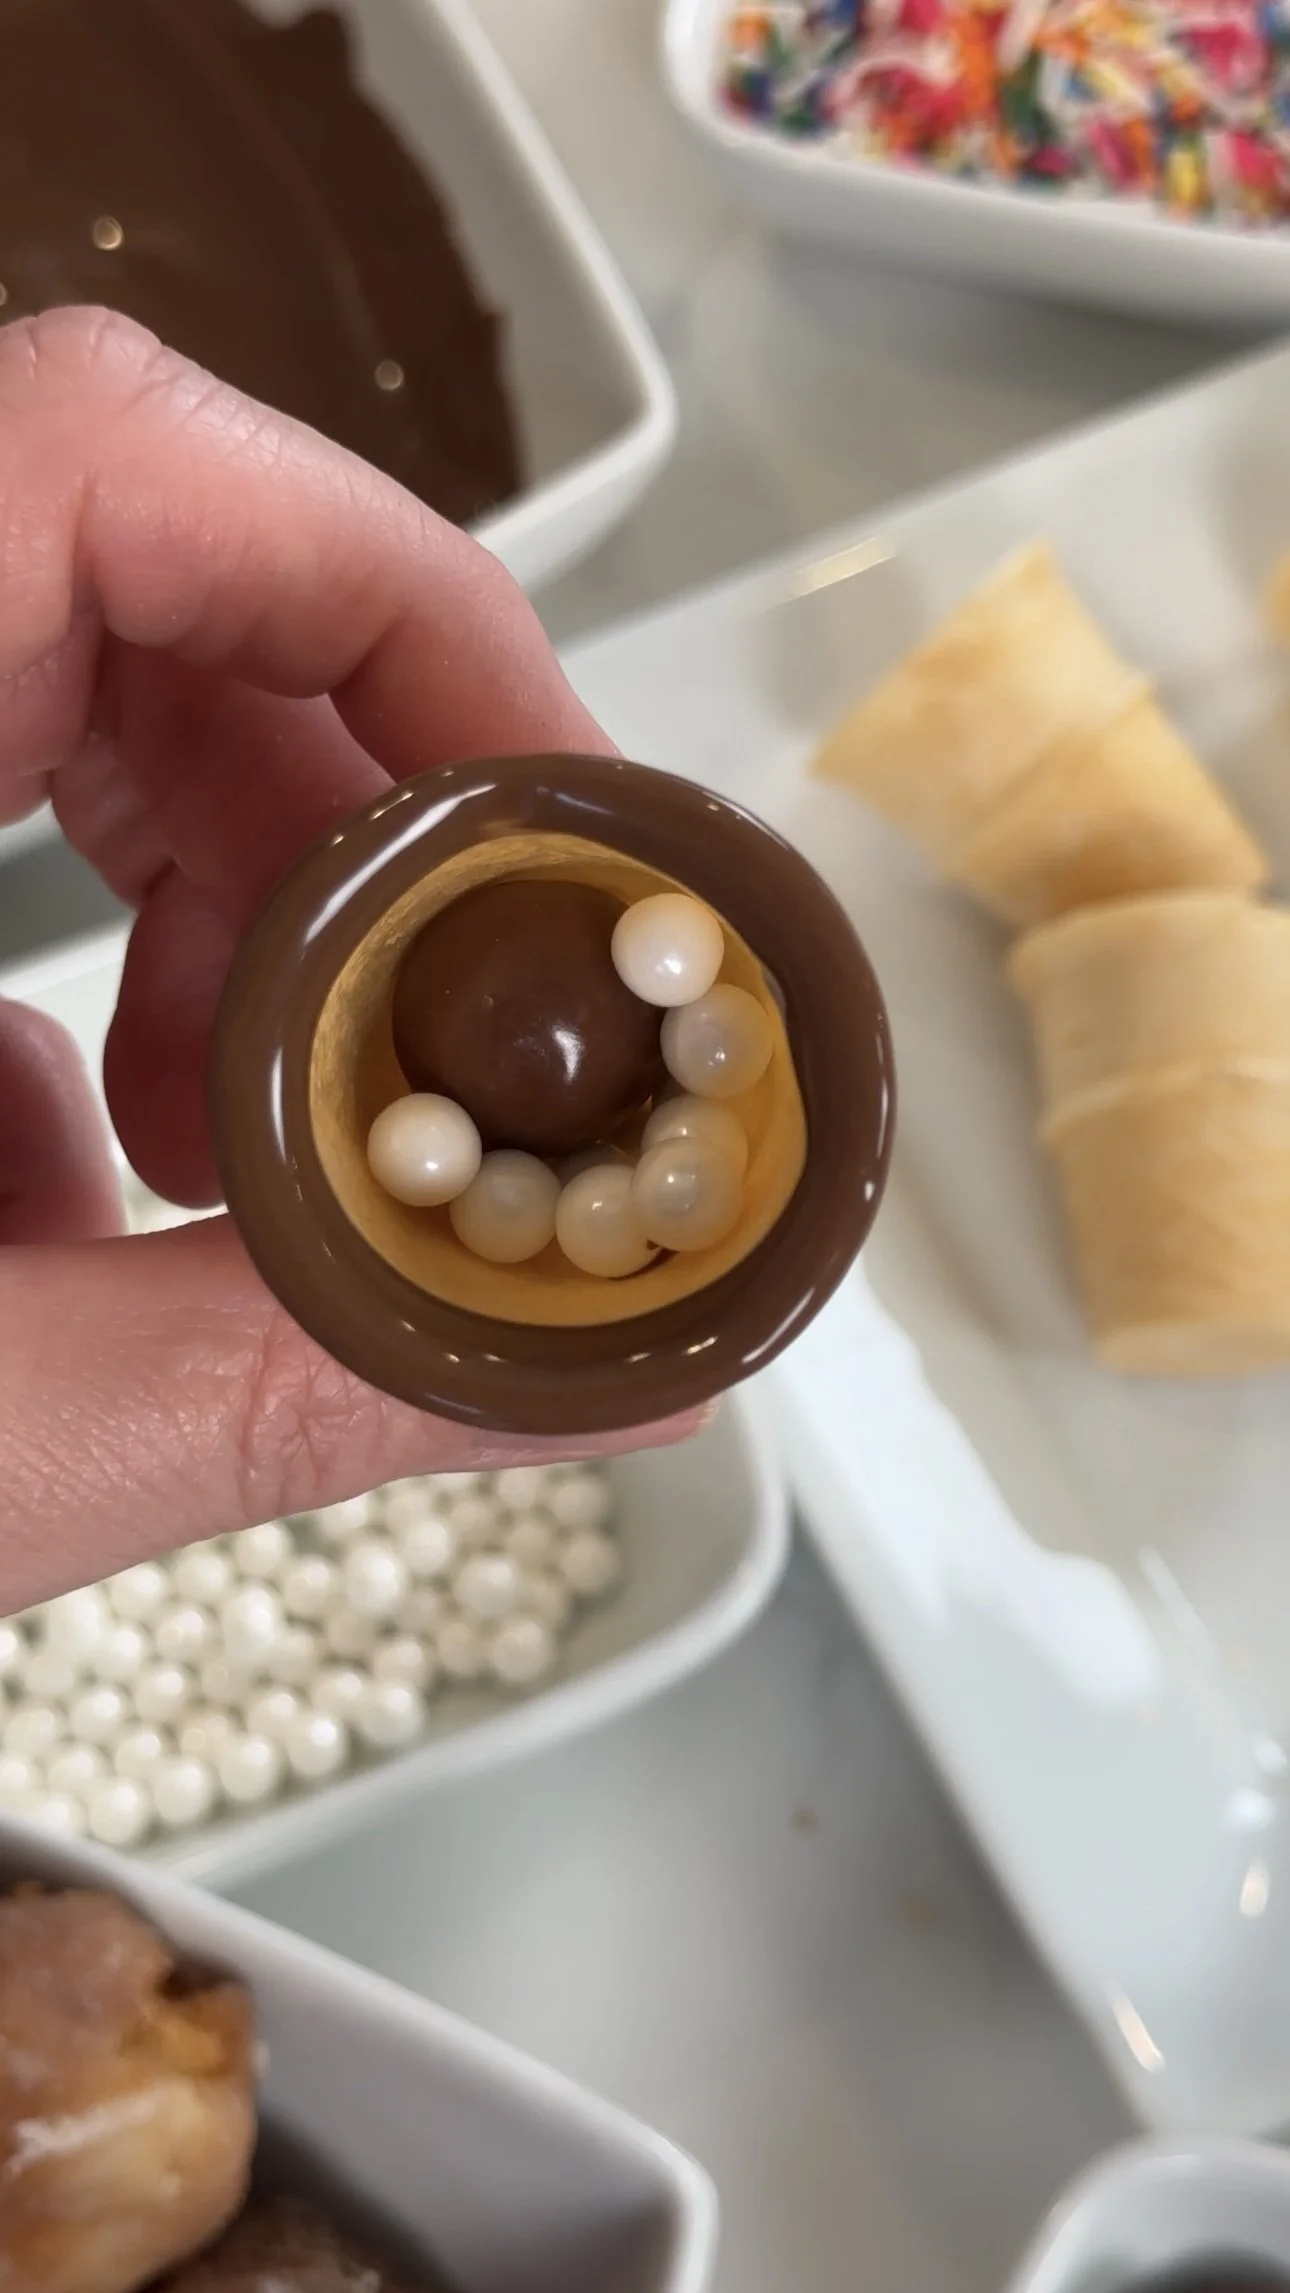
Add a Surprise Filling:
For an extra element of fun, insert a few Whoppers or your candy of choice into the bottom of each cone working quickly before the chocolate sets. Sprinkles are always fun too! This hidden surprise will delight anyone who bites into the cake pop.
Secure the Donut Holes:
Carefully place a donut hole on top of each cone before the chocolate has hardened. Press down gently to secure it in place. The melted chocolate will act as glue, adhering the donut hole to the cone. Allow the chocolate to set completely before moving on to the next step.

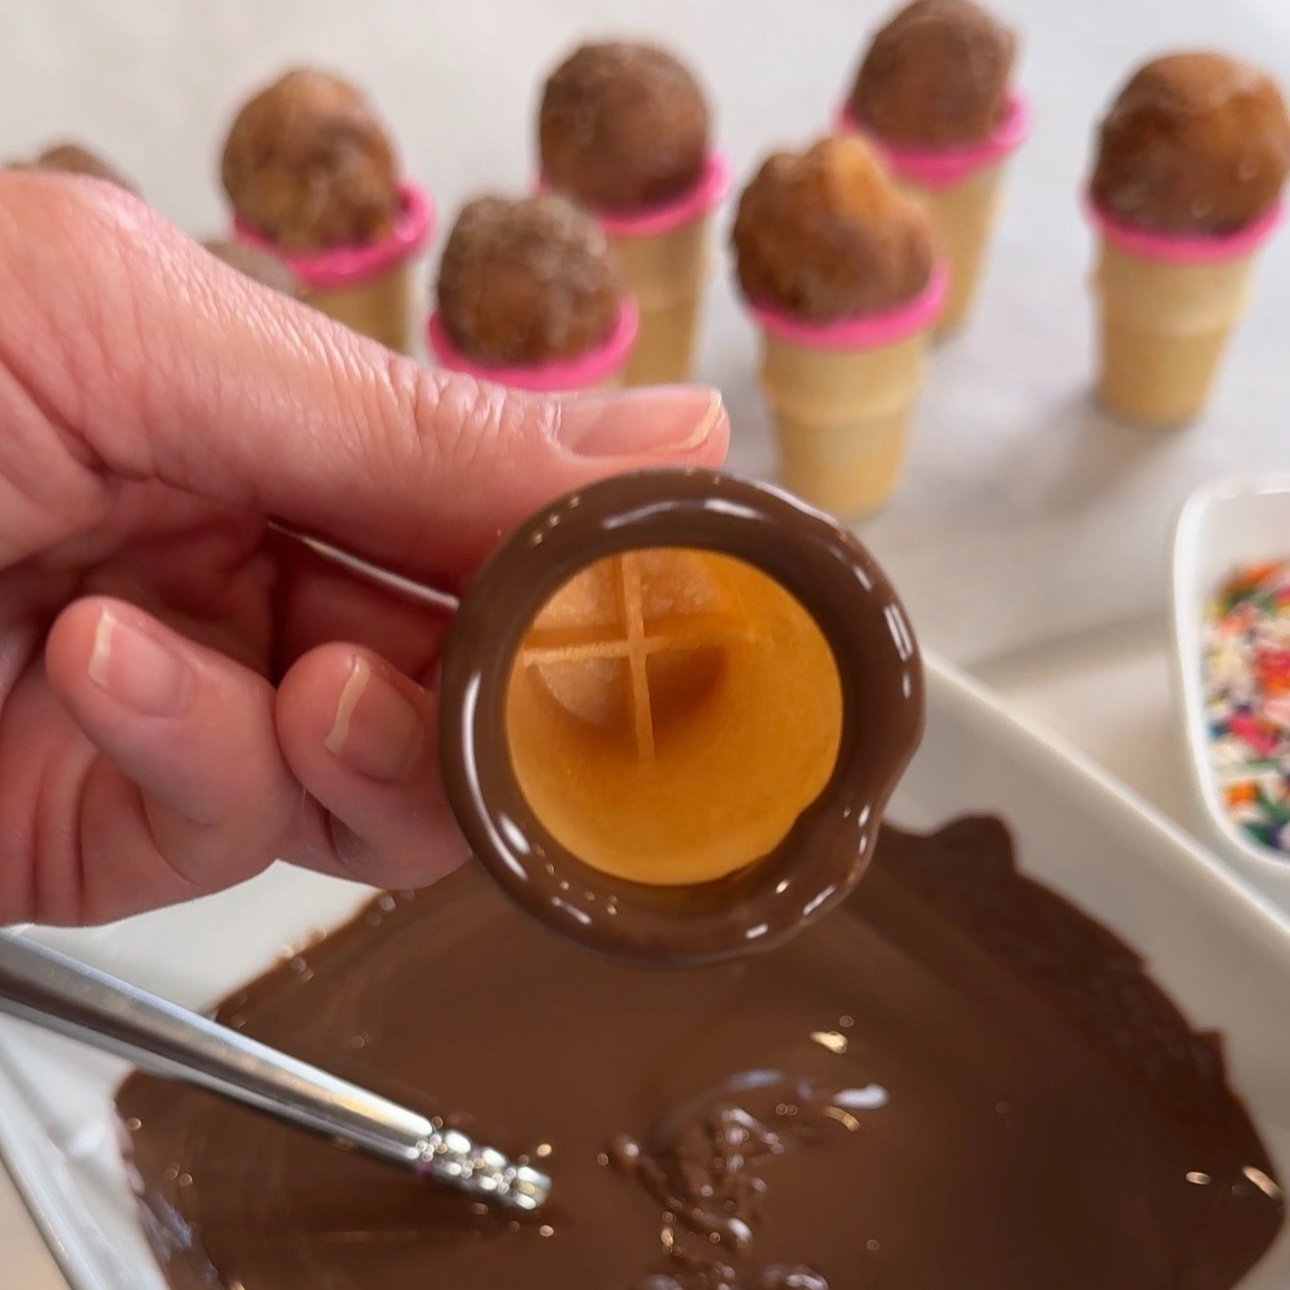
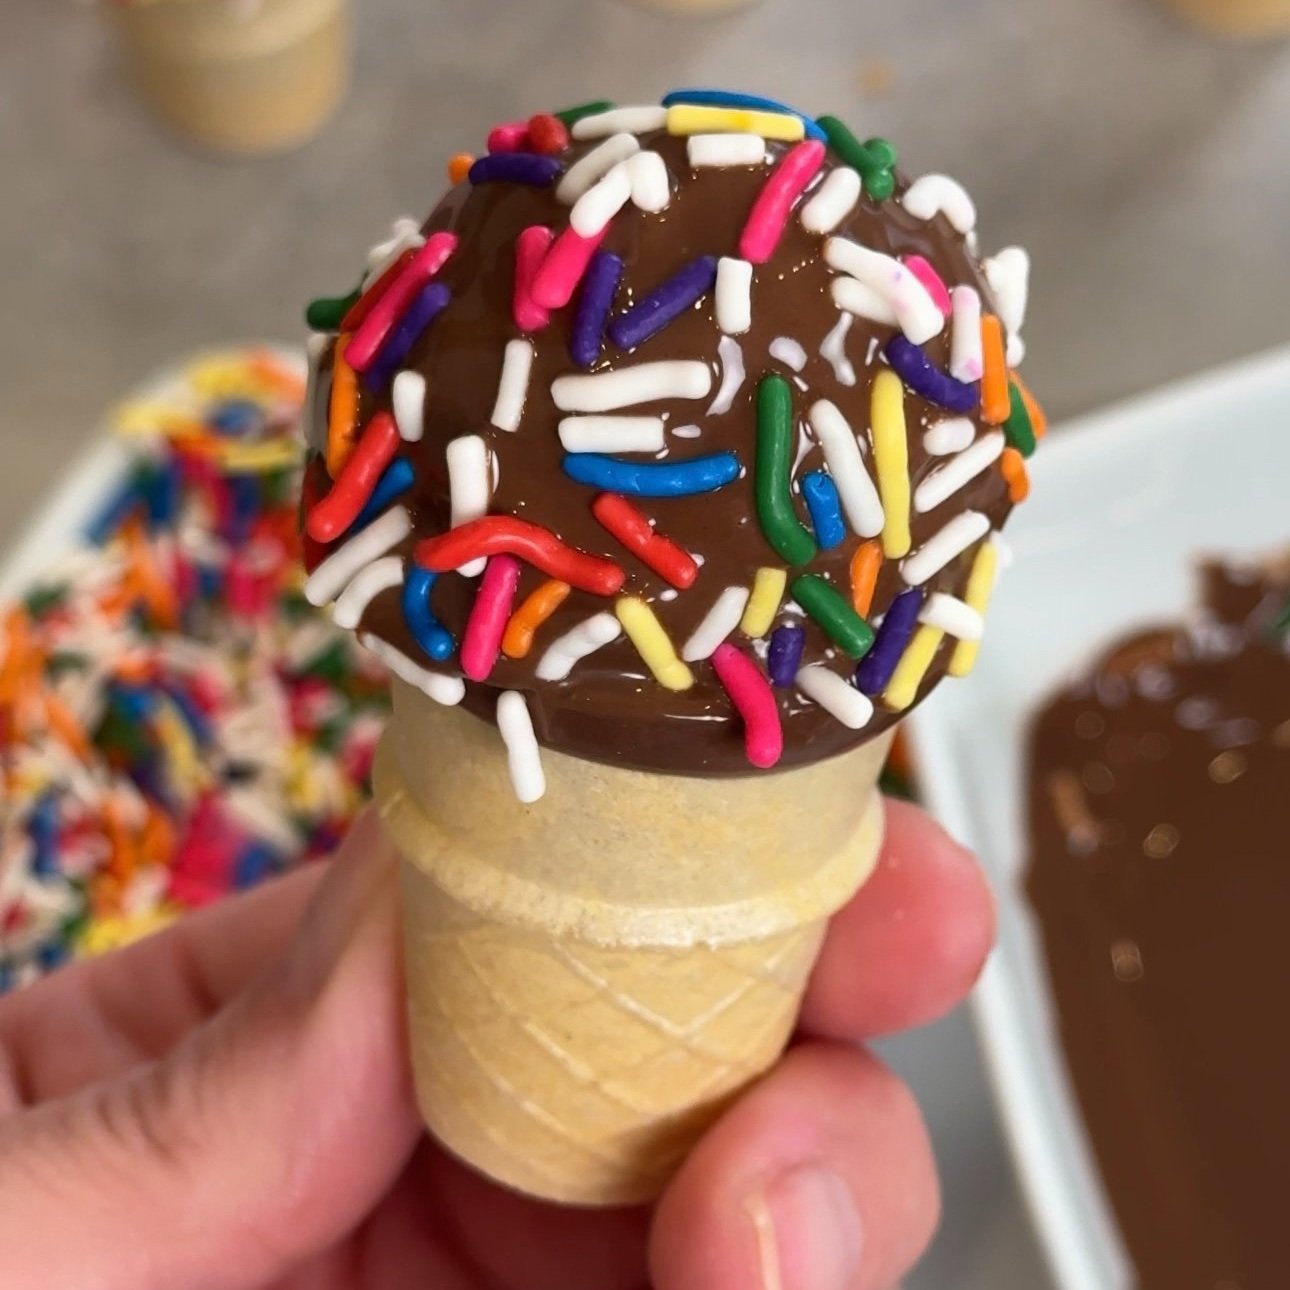
Dip Your Ice Cream Cones:
Dip the entire donut hole that is now attached to the cone back into the melted chocolate or candy melts. You’ll want to make sure the donut hole is covered completely. It is ok to overlap slightly on the cone. This ensures that the donut holes are securely attached to the cones. Now these treats are really starting to look like ice cream cones!

Decorate with Sprinkles:
While the chocolate is still wet, sprinkle nonpareils or your favorite sprinkles over the surface of the cake pops. This step adds a pop of color and texture, making the treats even more visually appealing. Feel free to get creative with your decorations and experiment with different colors and shapes.

Let Them Set:
Once you’ve finished decorating the ice cream cone cake pops, allow them to set completely at room temperature or in the refrigerator. This will ensure that the chocolate hardens and the decorations stay in place. Once set, your cake pops are ready to be enjoyed!
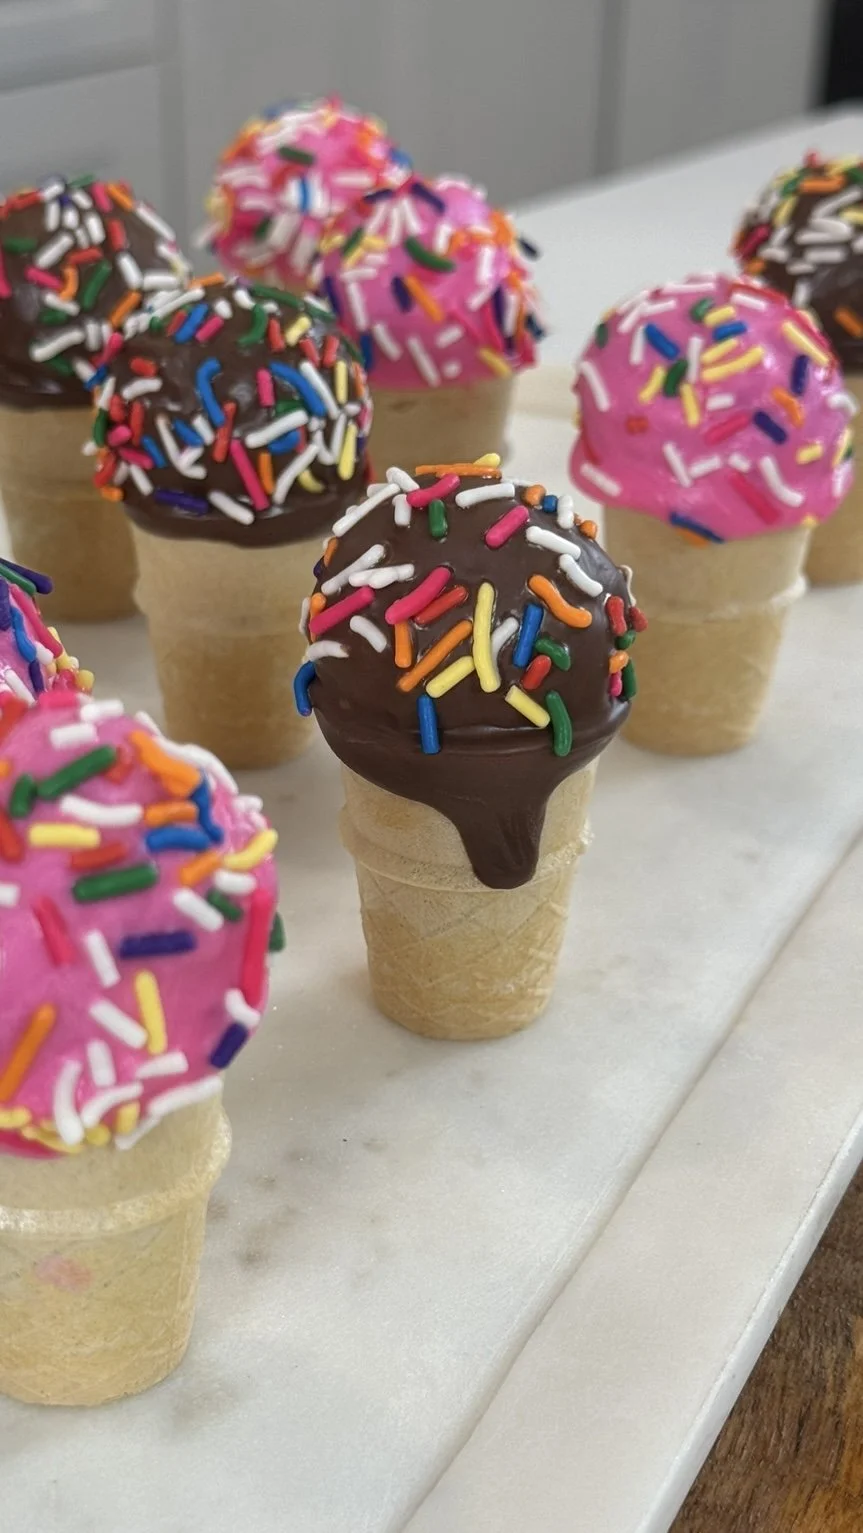

Creating ice cream cone cake pops using donut holes is a fun and easy way to elevate a classic treat. With just a few simple steps, you can transform ordinary ingredients into adorable and delicious desserts that are sure to impress. Whether you’re hosting a party or simply craving something sweet, these whimsical cake pops are guaranteed to delight. So gather your ingredients and get ready to craft some sweet memories with this delightful recipe!
A few other delicious treats that were recently shared on our blog are Whipped Nutella Dip and Kool-Aid Pie. Make sure to check these out too!