
Creating DIY Bunny Pretzel Treats: A Fun and Easy Guide for Sweet and Salty Snacks

In the world of DIY snacks and holiday treats, creativity meets simplicity in the most delightful ways. One such delightful creation that's been hopping into the heart of DIY enthusiasts and food lovers alike are these Bunny Pretzel Treats. This treat ingeniously combines the salty crunch of pretzel snaps with the sweet allure of candy melts, the colorful charm of M&M's, and the personalized touch using food-safe markers to hand drawn playful details. These are as fun to make as they are to eat. Whether you're preparing for Easter, hosting a spring-themed party, or just in the mood for a creative snack-making session, these Bunny Pretzel Treats are sure to add a burst of joy and flavor to your occasion. Just imagine these as part of your next spring gathering, the blend of sweet and salty never goes out of style!
Ingredients and Supplies:
- Pretzel snaps: The base of these bunny treats, providing a perfect salty crunch.
- Candy melts (in white or pastel colors for that spring vibe): These will be melted and used to create the base that we’ll attach the bunny faces to.
- Pastel M&M’s: For the cute little faces and ears of our bunny creations.
- Food-safe markers: To draw on those final details that bring our bunnies to life.
- Parchment paper: To line your baking sheet and ensure your treats don’t stick.
- Baking sheet: To arrange your pretzels and candy melts for the melting process.
Creating Your Bunny Pretzel Treats:
Step 1: Preheat and Prepare
Begin by preheating your oven to 200 degrees Fahrenheit. This low temperature is perfect for melting the candy melts without burning them or the pretzels. While the oven heats, line your baking sheet with parchment paper for a non-stick surface that will make your treat-making process smooth and mess-free.
Step 2: Assemble Your Base
Place your pretzel squares in a single layer on the lined baking sheet. These pretzel squares act as the canvas for your bunny treats.

Step 3: Add Candy Melts
Top each pretzel square with one candy melt. You can mix and match colors if you like, using a variety of pastel shades to create a vibrant assortment of bunny treats. The candy melts are kind of like the canvas that you’ll add your bunny heads to, so choose colors that will make your decorations pop.
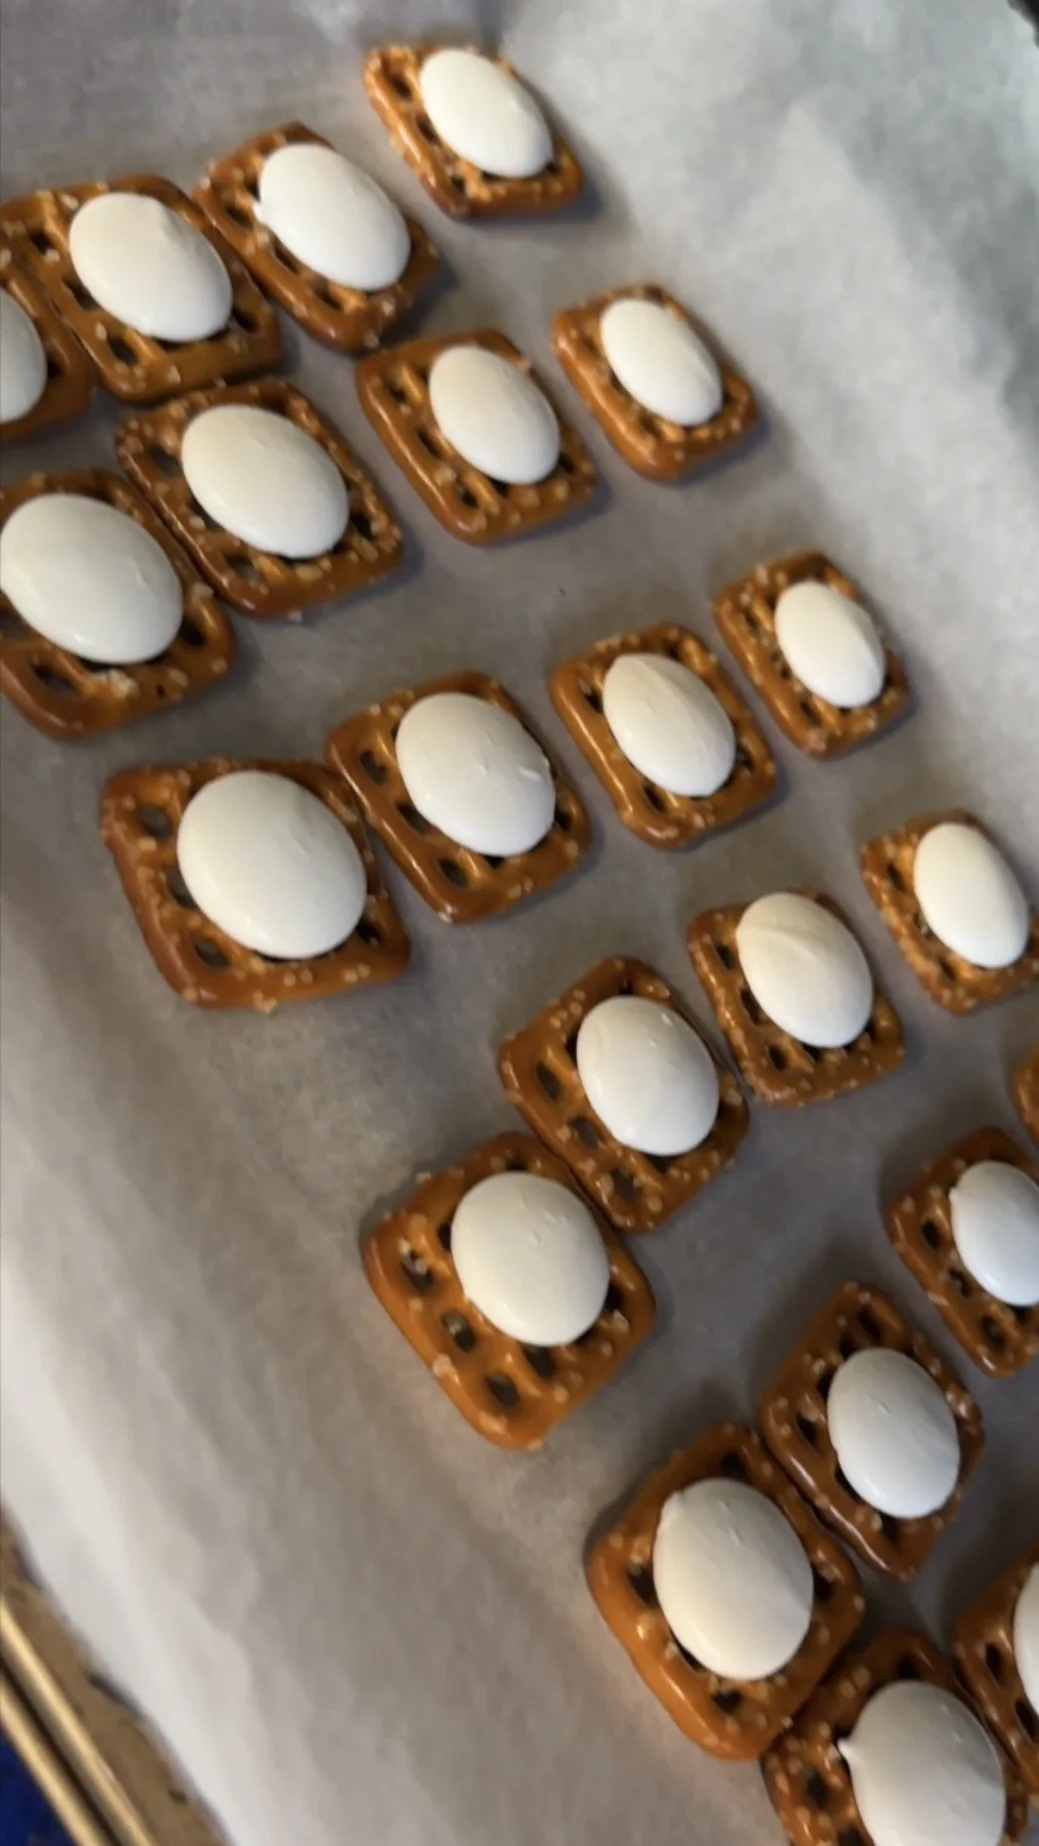
Step 4: Melt to Perfection
With your pretzels and candy melts assembled, carefully place the baking sheet into your preheated oven. Leave them in just long enough for the candy to start melting, which should take only a few minutes. Keep a close eye on them; you’re looking for the candy melts to soften and become pliable, not completely liquid.

Step 5: Decorate with M&M’s
Remove the baking sheet from the oven using oven mitts to protect your hands. Quickly, but carefully, start creating your bunny faces. Press a pastel M&M into the center of each softened candy melt for the face. Then, take another M&M, chop it in half, and gently press the halves into the candy melt to form the ears. Work swiftly to ensure the candy doesn’t harden before you finish decorating.

Step 6: Cool and Detail
Allow your bunny treats to cool and set. This may take a few minutes. Once the candy melts have hardened again, it’s time to bring out the food-safe markers. Use these to draw eyes, whiskers, or any other details you’d like to add to your bunny faces. This step is where you can really personalize each treat and have fun with your designs.

Tips for Perfect Bunny Pretzel Treats:
- **Work Quickly:** After removing the pretzels and candy melts from the oven, you’ll need to work quickly to add the M&M’s before the candy re-hardens.
- **Cool Completely:** Make sure your treats are completely cooled and the candy is set before moving them or drawing on them. This will prevent smudging and keep your designs intact.
- **Experiment with Colors:** Feel free to use a variety of candy melt and M&M colors to create a diverse batch of bunny treats. Spring pastels work especially well for a festive look.
- **Storage:** Store your bunny pretzel treats in an airtight container at room temperature to keep them fresh and ready to enjoy.
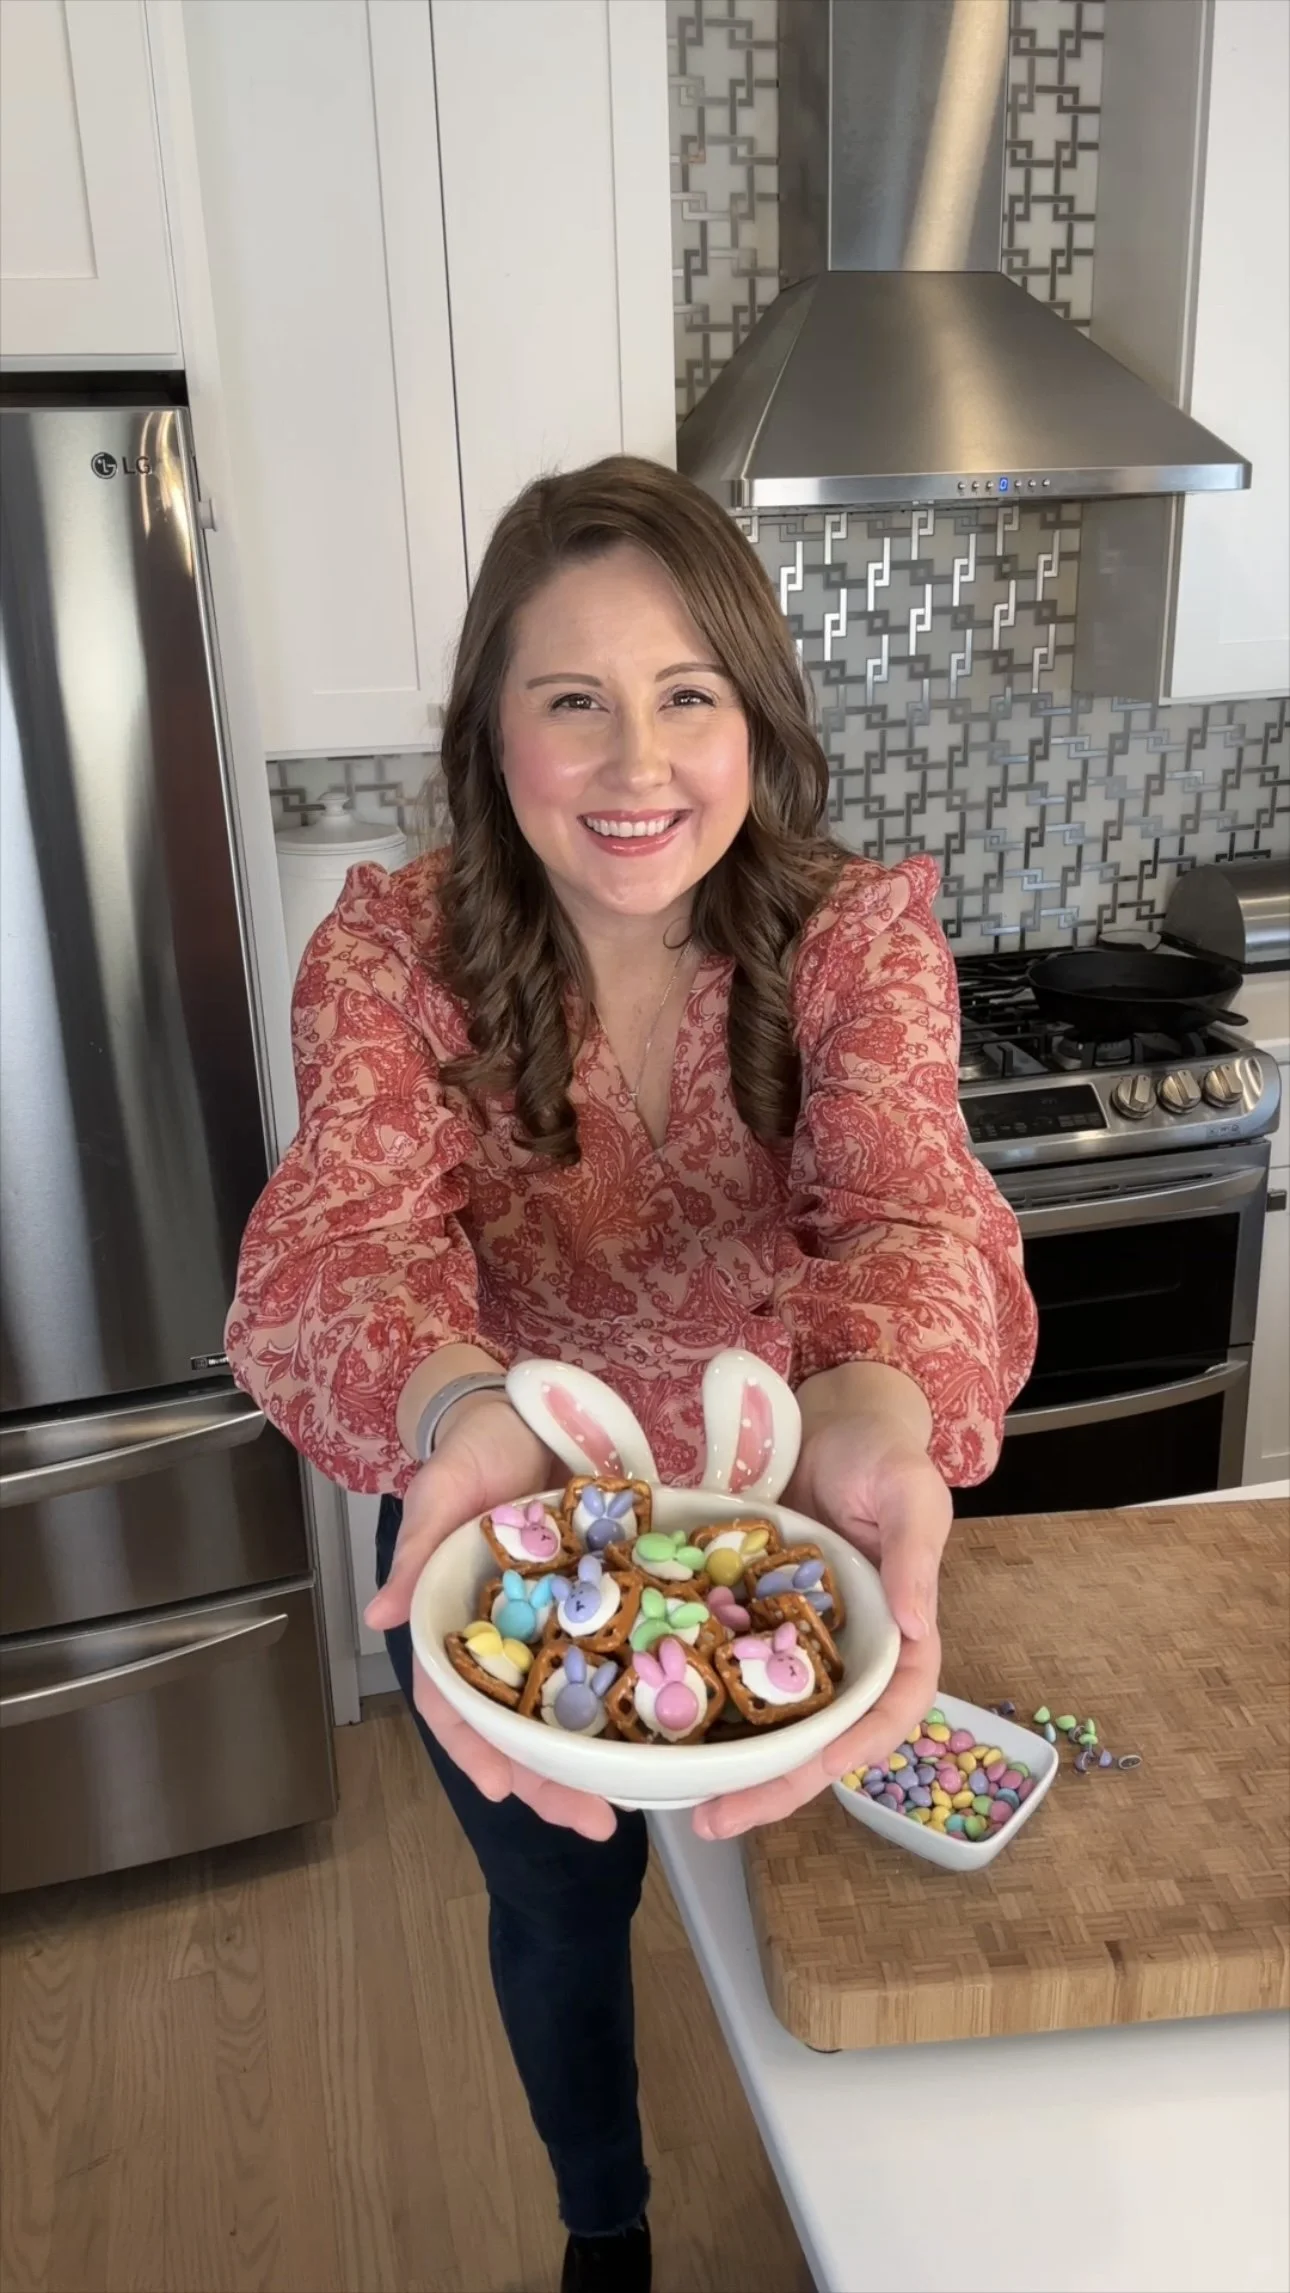
Remember, the key to great Bunny Pretzel Treats is not just in the making but in the sharing. Enjoy the process, get creative, and don’t forget to share your delightful creations with friends and family. After all, a shared treat is a doubled joy! My kids are always excited when they see these adorable Bunny Pretzel Treats and make great helpers drawing on the little details! Whether you’re looking for a unique treat for an Easter basket, a fun project for a spring afternoon, or just a creative way to satisfy your sweet and salty cravings, these bunny treats are sure to please. Happy crafting, and enjoy your adorable and tasty creations! Check out our video tutorial too.
For more Easter fun check out some really cool egg-coloring methods like: Cool Whip Easter Eggs or Shaving Foam Eggs! If you prefer more fun treats you might enjoy this Easter Egg Fudge or Peeps Duck Pond.